Dopo il Guest post di settimana scorsa scommetto che ti è venuta voglia di preparare frullati e frappé di ogni colore.
Tiina, food blogger finlandese, ci ha infatti solleticato il palato con gustose ricette vegane come il suo blog My berry forest. Nel caso ti fosse sfuggita la sua proposta sei ancora in tempo per provare questi golosi e coloratissimi smoothies arcobaleno in cinque varianti.
Oggi invece Tiina ci racconterà come realizza i suoi set, che tipo di attrezzatura fotografica usa e se dietro le quinte del suo processo creativo si nasconde una formazione professionale oppure è, come buona parte di noi, una autodidatta.
Passa a trovarla anche su Instagram!
Se vuoi partecipare a questa rubrica invia la tua candidatura, scrivimi ↓ Loro lo hanno già fatto ↓
*** ** ***
Sono una fotografa autodidatta. Ho comprato la mia prima Reflex esattamente un anno fa, nella primavera del 2015 e ho cominciato a fotografare l’estate scorsa dedicando ogni singola ora del sonnellino quotidiano di mio figlio allo studio del manuale delle istruzioni. E ho anche letto un sacco di libri sulla fotografia. Mi sto ancora esercitando, ma per il momento sono contenta di aver imparato a padroneggiare bene le impostazioni di base.
Per prima cosa penso alla ricetta che vorrei realizzare: ho molto senso visivo, così tutte le idee che mi passano per la testa mi appaiono subito ben chiare. Poi è il turno del gusto e il passo successivo è abbozzare la ricetta e … provare, provare e provare ancora.
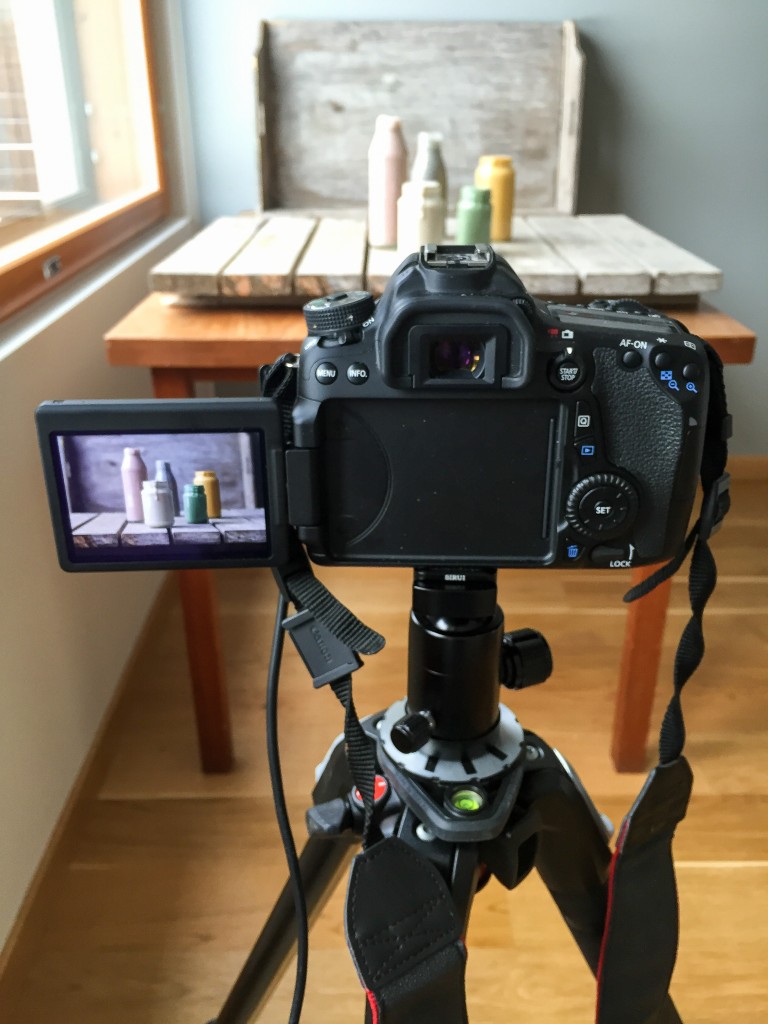
Cucino il giorno stesso (o al massimo quello prima) in cui decido di scattare le fotografie e poi mi dedico alla preparazione del set: sposto il nostro tavolo da pranzo più vicino alla finestra, scelgo gli sfondi e gli accessori, piazzo il mio treppiede e faccio qualche scatto di prova per decidere le impostazioni della macchina fotografica.
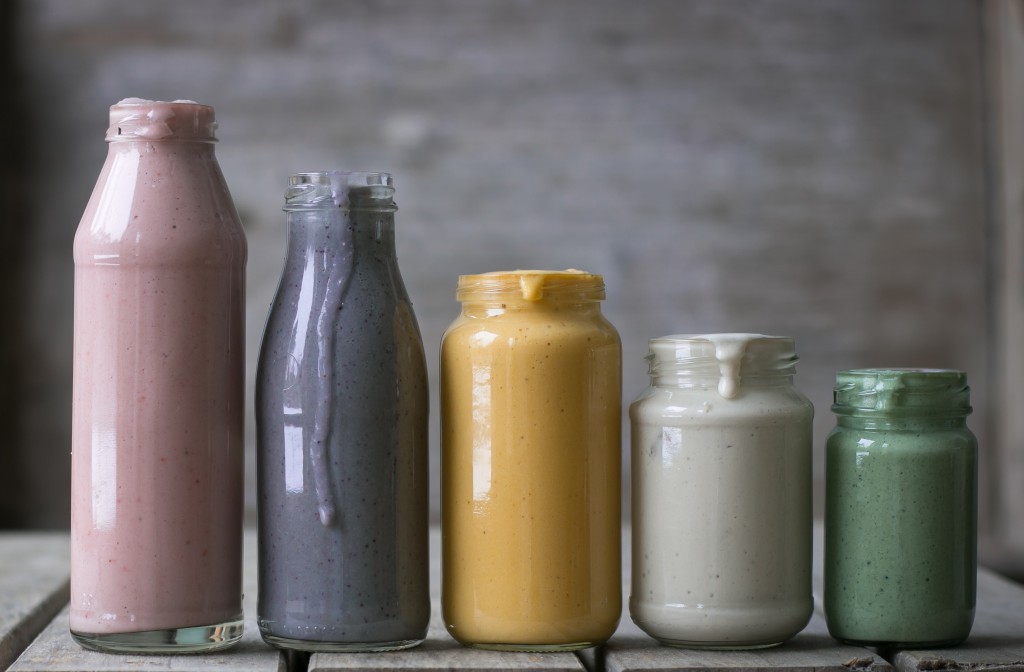
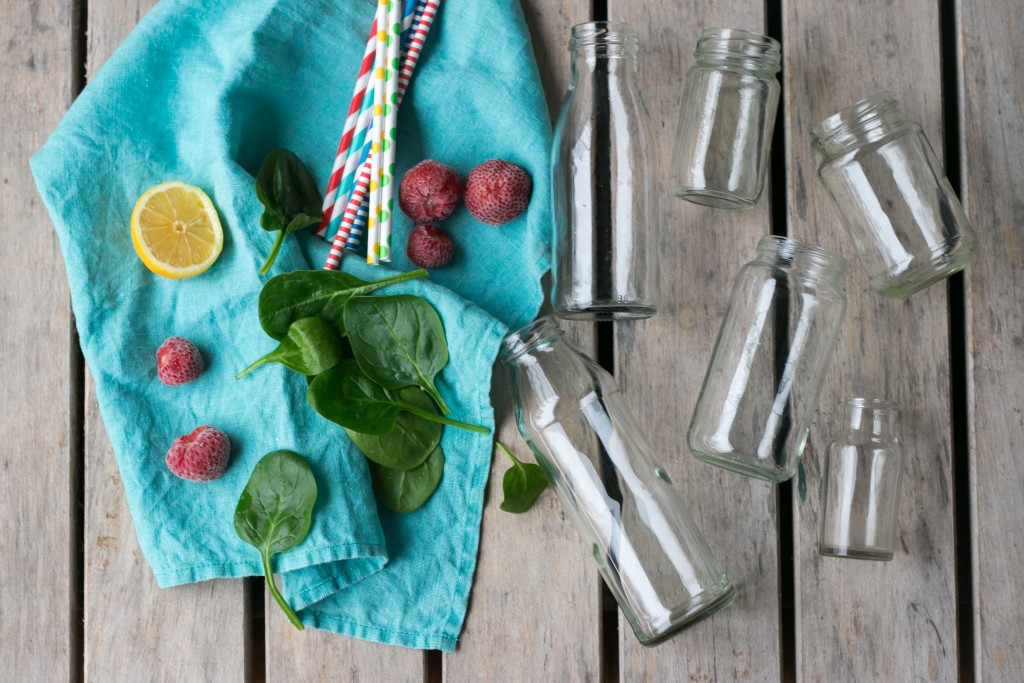
Il food styling è il passo successivo: cerco di rendere ciò che ho cucinato più gradevole a vedersi e scelgo piccoli dettagli per farne risaltare i colori e la consistenza. Con questi smoothies ho voluto ricreare un’atmosfera minimalista e così non ho aggiunto troppi accessori: i barattoli di vetro e i loro colori vivaci sono sufficienti.
Ancora qualche scatto di prova con i piatti e gli accessori piazzati e poi inizio a fotografare seriamente! Scatto dalle 20 alle 100 foto a seduta. Per me la fotografia è una fonte di ispirazione molto creativa: ho una visione marcata dell’immagine finale e cerco di fare del mio meglio per realizzarla. Qualche volta, però, capita che quello che ho in mente si evolva mentre sto fotografando e allora può succedere che la fotografia definitiva diventi ancora più bella di come me l’ero immaginata. La creatività è come una grande forza e io mi sento più viva quando sono immersa completamente in quello che sto facendo.
La fase finale è trasferire le immagini al computer, scegliendo le migliori ed elaborandole con Adobe Lightroom; poi classifico le foto a seconda di dove le devo usare: di piccole dimensioni per il blog e Instagram e più grandi per essere stampate.
ATTREZZATURA, MATERIALI DI SCENA, ECC.
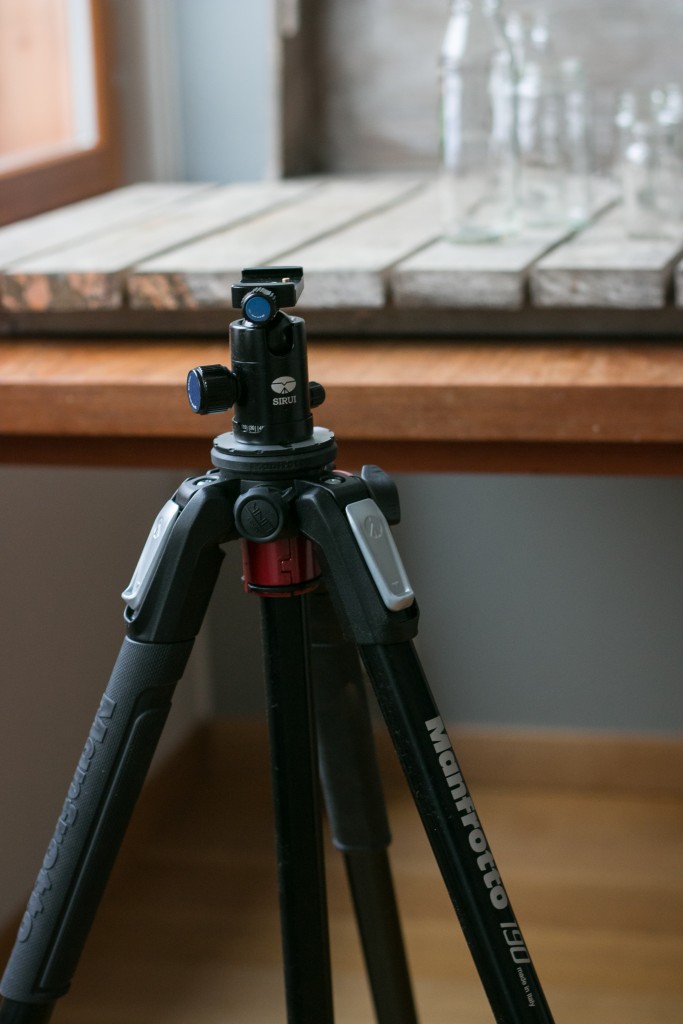
Utilizzo una CANON 70D con obiettivi CANON EF da 50 mm f/1.8 e un treppiede Manfrotto che ho acquistato lo scorso autunno. Quest’anno ho intenzione di comperare dei nuovi obiettivi e non vedo l’ora di vedere la differenza che sicuramente ci sarà.
Scatto sempre le fotografie nella nostra cucina sfruttando la luce naturale che entra da sinistra da una grande finestra.
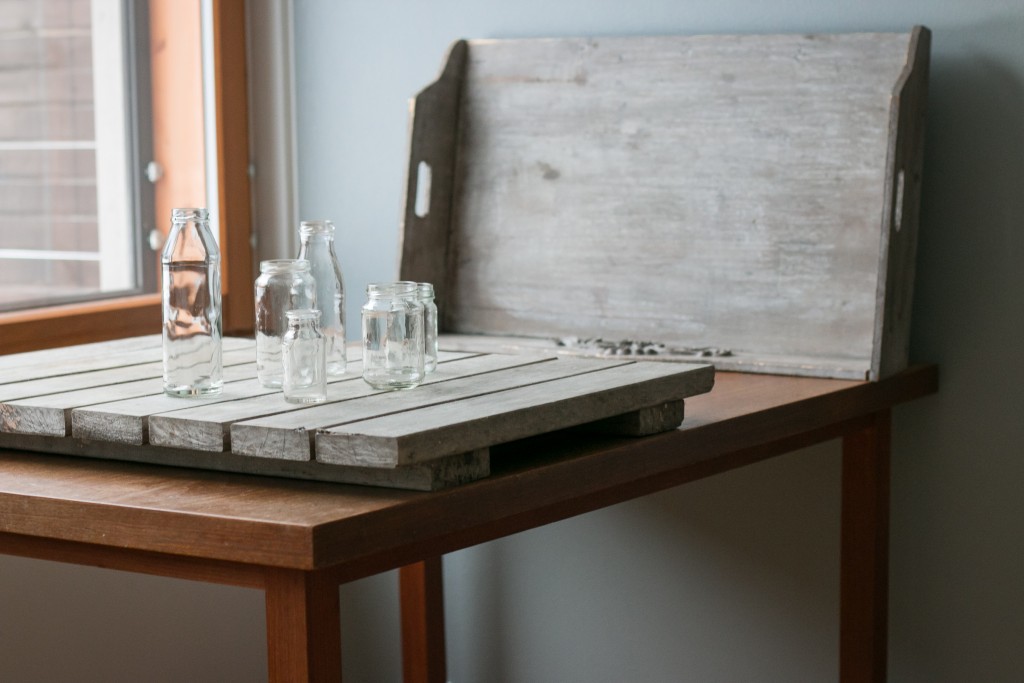
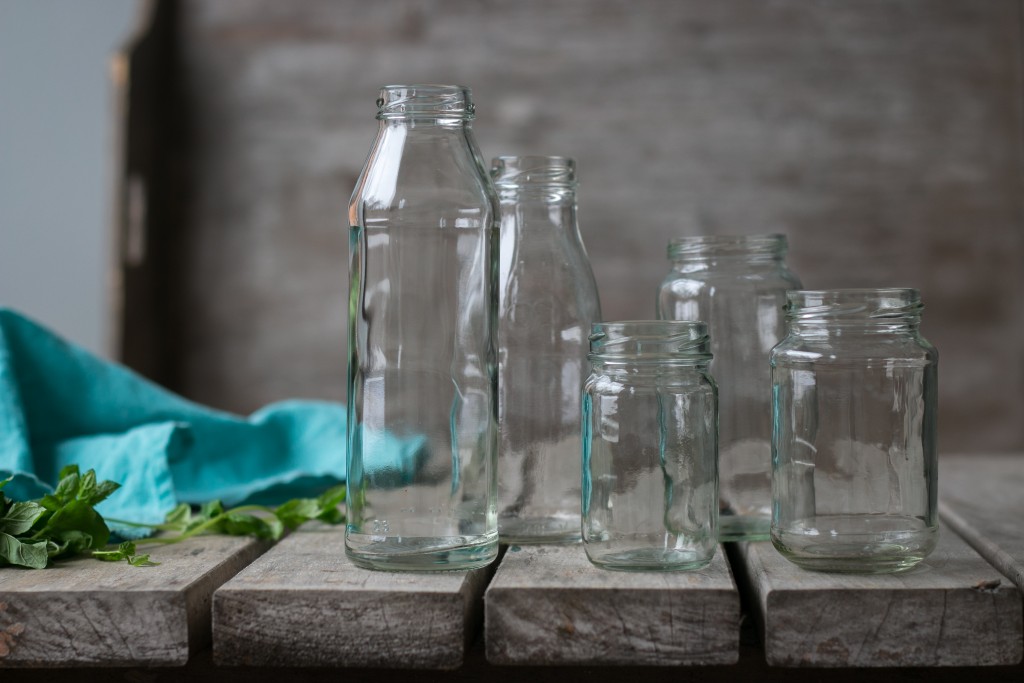
Come sfondi utilizzo cinque diverse tavole di legno realizzate da mio papà e da mio marito. Mi piace disporre di una gran varietà di sfondi con una gamma di colori che va dal marrone chiaro, al grigio, fino al blu. Uso i materiali di scena per valorizzare l’atmosfera che voglio creare con l’immagine e nella mia cucina ho un’intera credenza solo per loro: barattoli di vetro di ogni forma e dimensione, ciotole e piatti, utensili di legno, utensili e giochi d’epoca, strofinacci ecc.
POST PRODUZIONE
Fotografo con la tecnica RAW così, nella post produzione, utilizzo sempre Adobe Lightroom. Non mi piacciono le foto troppo modificate e utilizzo l’editing solo per far risaltare i colori naturali e la brillantezza delle immagini.
Se sei un fotografo di food alle prime armi, il mio unico suggerimento è quello di esercitarti con il manuale delle istruzioni. Per prima cosa cerca su Google le nozioni basilari della fotografia, per esempio l’apertura del diaframma, la sensibilità della pellicola e la velocità dell’otturatore, poi inizia a sperimentare fotografando. Alla fine imparerai come ciascuna di queste impostazioni influenzi ognuno di noi e le immagini finali.
Non aver paura di sperimentare e fidati della tua percezione creativa!
*** ** ***
ENGLISH VERSION
I am a self-taught photographer. I bought my first dslr camera one year ago in spring 2015. I began practicing photography in the summer of 2015, and spent every hour of my son’s day time nap to practice the manual settings. I also read a lot of photography books. I’m still practicing, but I’m happy to master the basic settings well now.
First comes the idea of the recipe I want to create. I am very visual so all my ideas just pop into my head as an image. Then come the flavors, and the next step is drafting down the recipe and then testing, testing, testing.
On the day of the photo shoot (or the day before) I make the food. Then I set up the photo shoot: move our dining table closer to the window, choose backgrounds and props, set up my tripod and take a few test shots to determine the camera settings.
Food styling is the next step: making food pretty, choosing little prop details to make the food colors and textures pop. With these smoothies though, I wanted to create a minimalistic mood so I didn’t add a lot of props: the glass jars and the colors of the smoothies were enough.
A few test shots again with the food and props in place and then I start the photo shoot! I take about 20-100 photos per session. Shooting is a very creative flow process for me: I have a strong vision of the image and I try my best to achieve it. Sometimes my vision evolves as I shoot so that the actual image becomes even better than I imagined. Creativity is such a great force and I feel more alive when I’m experiencing the “flow”.
The final stage is moving the images to the computer, choosing the best ones to edit and then editing in Lightroom. Then I resize the pics depending on where I need them: small sizes for both blog and IG, but bigger sizes for print.
I use a Canon 70D with a basic Canon EF 50 mm f/1.8 lens. I also use a Manfrotto tripod, which I bought last Autumn. I will invest in a new lens this year, and can’t wait to see a difference in the images.
I always take my photographs in natural light, in our kitchen with a large window (light coming from the left). As backgrounds I have about five different wooden boards made by my dad and my husband. I love a variety of backgrounds, the colors range from light brown and grey to blue. I use props to enhance the mood I want to create with the image, and I have a whole cupboard just for them: glass jars in every shape and size, bowls and plates, wooden utensils, antique utensils and treys, kitchen towels etc.
I shoot RAW so I always use Lightroom in post-production. I am not too fond of heavily edited photos so I use editing just to boost the natural colors and brightness of the image.
If you’re a beginner in food photography my one and only tip is to practice with manual settings from the very beginning. First google the basics of photography: about aperture, ISO and shutter speed settings, and then just start adjusting these settings when you shoot. Eventually you will learn how each of these settings affect each other and the outcome. Don’t be afraid to experiment! And trust your unique creative vision!
I hope that you find these tips helpful and inspiring in your own photography!
Here you can find other ☆ “Guest Post Recipe” ☆
If you want to write a guest post/behind the scenes for me click here!
Ti è piaciuto questo articolo? Allora non perdere i prossimi, iscriviti alla NewsLetter oppure seguimi anche su Instagram per essere sempre aggiornato.
A presto, buona giornata

[…] If this smoothie is a bit too green for your taste, you might want to check out my Healthy Green Smoothie Guide to guide you through different shades of green. And if you would like to see more smoothie inspiration, I wrote a guest post for beautiful opsd blog (by the lovely Sonia Monagheddu). You can find my RAINBOW smoothies here (both in English and Italian) and some Behind the scenes action and insight about my creative flow and a few tips on photography here […]